
Don’t let A/C problems ruin your new homeowner experience. Follow these tips to perform a visual inspection and learn what you can fix and when you need to call a pro.
As a new homeowner, you may not know the first thing about A/C maintenance, since it’s likely something you’ve never had to worry about before. Luckily, you have us to give you the scoop on what you need to know — and when you need to call in the reinforcements — to keep your central A/C in tip-top shape.
First: The A/C Inspection
Sure, you had an initial once-over of your home A/C unit during your home inspection. But that doesn’t mean you don’t need to keep tabs on your unit from here on out. In fact, at least once a year — preferably in the spring, before you really start using the unit for cooling — you need to perform your own inspection. Here’s what you need to look for:
1. Start by checking the outside unit. It should:
a. Be clean and free of obstructions; it shouldn’t be covered in any dirt or debris, such as leaves and grass clippings.
b. Be level on the ground.
c. Have at least 2 feet of clearance around it.
d. Have insulation around the refrigerant lines that isn’t torn or compromised in any way.
2. Then, move inside. The vents should have noticeably cold air blowing out of them, and you shouldn’t hear any strange noises coming from the system.
Next: A/C Maintenance You Can Do Yourself
Now it’s time to begin your maintenance. Follow these steps:
1. Turn off all power to the unit. That includes turning off power at the breaker box, as well as at the exterior shut-off box near the unit, if applicable.
2. Fix inspection issues. If you noticed that the outside unit needs to be cleaned, you can remove the fan cage at the top of the unit with a screwdriver or wrench and remove the leaves and debris using your hands or a wet/dry vacuum. Then, using a garden hose (NOT a pressure washer), spray the unit from the inside out. If you notice that any of the “fins” surrounding the unit are bent, carefully straighten them with a butter knife. Likewise, make any other necessary changes to ensure the unit is level with the proper clearance and insulation around the refrigerant lines.
3. Check the outside fan blades and wiring. Remove the fan cage at the top of the outside unit, if you haven’t already, and examine the fan blades for any cracks or chips. Likewise, remove the access panel on the unit to check the wiring for any signs of overheating, which includes melted insulation on the wires and blackened or burned-looking wires.
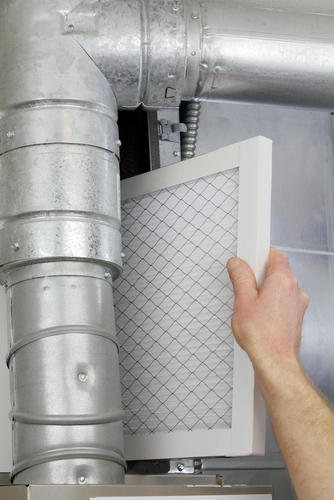
4. Change the air filter. If you haven’t done it recently, follow the manufacturer’s instructions for switching out the air filter. This should be done every one to three months, for optimal efficiency.
5. Examine your thermostat. At this point, it’s safe to turn the power to the unit back on. Then, over the next few days, check to make sure your thermostat is working properly by keeping your home at the right temperature.
When to Call in the Professionals
If during your maintenance, you come across any issues that you can’t easily resolve, such as melted wiring or choosing the correct replacement fan blades, you’ll need to contact a professional. Likewise, if you’ve performed your maintenance and your unit is making strange noises or not working properly in other ways, you’ll need professional expertise. Want to simply get a thorough cleaning and checkup for peace of mind? An expert is the way to go.
If you’re not already, protect your new home — and budget — from the inevitable A/C system component repairs with an American Home Shield home warranty.
All rights reserved to the initial publisher for AHS.
Collected and published by Arms &McGregor International Realty® editorial team. Get in touched with us at [email protected]